

The Easy Way To Get Rid Of Shin Splints
Shin splints are a very common injury among runners, dancers and more generally in any sports involving foot impacts.
It refers to a pain around the shinbone, on the inside (medial shin splints) or the outside (anterior shin splints) part of the leg.
The most common causes of shin splints are the following:
-
Sudden increase in the training routine (over use)
-
Shoes not adapted
-
Over pronation
-
No warm up
-
Inadequate stretching
Very often, the beginner runners will suffer from shin splits if they increase their mileage abruptly or don’t wear the adapted shoes, but confirmed runners can also suffer from this injury if they don’t properly build up their training.
What are the symptoms?
A lower leg pain doesn’t mean that you suffer from shin splints. However, the symptoms are the following:
- Pain around the shin bone, difficult to precisely locate
- Pain that increase while exercising
- Tenderness along the inner part or the outer part of the shin bone
Solving a shin splints problem can be fastidious, but by following the recommendations below, you will rapidly get back into your favourite activity.

Stretching the shins
The most effective way to prevent shin splints is to regularly stretch the lower legs.
The inflammation and the accumulation of tension along the shin bones are responsible for the pain. By releasing the tension, you will reduce the inflammation and the associated pain.
1. Myofascial release
Start with a deep massage of the area. Use your fingers or a massage tool like a massage ball or a trigger point tool to release and break every trigger point you can feel along your shin. This can be a painful process but it will help to deeply release the tension.
2. Roller massage
Once all the trigger points have been worked on, use a foam roller to massage the whole area. Roll on the front, the back and the side of your legs.
3. Ice massage
End the massage session with an ice massage to help reduce the inflammation. You can use either an ice pack or use massage tools that combine Myofascial release and cold therapy.
Strengthening the shins
With only a few exercises done on a regular basis, it is possible to greatly strengthen the shin muscles, which results in a significant improvement of a shin splints condition.
There are a lot of variations to these exercises, here are presented the overall movements and a couple of variations. Depending on the variation these exercises will appear more or less difficult. The choice of the variation will depend on your current physical condition, start from a simple variation then increase in intensity.
1. Toe raises
The principle behind this exercise is to strengthen the muscles that surround the front and the side of the shin bone.
The easiest variation of this exercise is to sit on a chair with both feet flat on the floor. Slowly raise your toes to the sky while keeping your heels on the ground. Hold that position for a moment then slowly return to the initial position.
To make that exercise more difficult, stand against a wall, with your feet flat on the ground, approximately 10 cm away from the wall, and slowly raise your toes to the sky, following the same method described above.
It is possible to control the intensity of that exercise when using a rubber band or a resistance tube. Choose a rubber band/resistance tube with the desired intensity, wrap it around a fixed point (chair, pole…) and put the other side of the band/handle around your foot. Pull your toes towards you so that the rubber or tube can come under tension.
Start with one set of 15 to 20 reps then gradually increase the number of sets.
2. Calf raises
Calf raises is the opposite motion where we intend to build up the calf muscle, located behind the shin bone.
In the basic variation, stand up and raise on your toes as much as you can so that your heels are off the ground. Hold that position for a moment then slowly come back to the initial position.
To make this exercise more difficult, you can stand on the edge a step. This will increase the range of motion. You can also try this exercise on one foot.
As for the toe raises, you can control the intensity of the exercise by using a rubber band or resistance tube. Sit on the floor wrap one end of the rubber band/handle around your foot and keep the other end in your hands. Push your toes forward so that the rubber band or tube can come under tension.
Start with one set of 15 to 20 reps then gradually increase the number of sets.
3. Heel to Toe Walk
This exercise strengthens all the muscles and tissues that surround the shin.
A each step, roll your feet from heel to toe and accentuate the movement so that on the start position your heel is on the ground and your toes are raised, and on the end position your toes are on the ground and your heel is raised. Make sure you perform this movement slowly.
Another variation of this exercise is to walk on your heels only for a few steps, then on your toes for a few steps.
Start with one set of 15 to 20 steps then gradually increase the number of sets.
Don’t forget to end your strengthening session with a good massage of the area as described in the Stretching section.
Getting back into sport
If you have suffered from shin splints, don’t go back immediately to high intensity training! You will most likely get injured again. It takes time to get back into shape, but the following tips can help getting back at it faster.
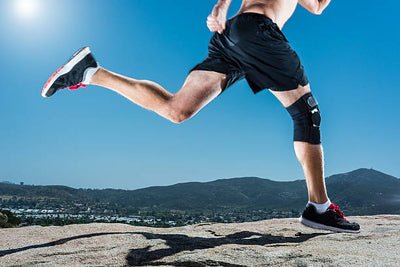
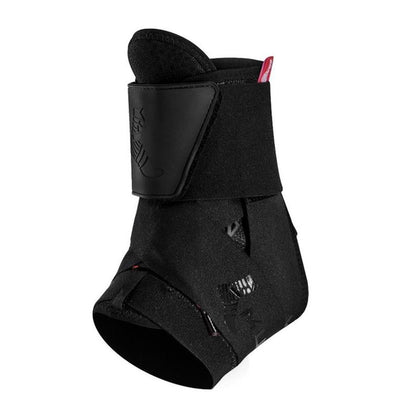
1. Wear compression gear
Whether it is compression socks, calf guards or kinesiology tape, they maintain a level of pressure around your shin an allow you to exercise more comfortably.
2. Check your shoes
Make sure that your shoes are right for you. Shin splints is a very common injury among over pronator runners. So make sure your shoes offer enough stability. It is recommended to change them once a year or every 300 to 500 km, so change your shoes often.
3. Wear insoles
Insoles will provide even more stability and can correct an over pronation. If you cannot see any result with off the shelf insoles, a podiatrist can make custom orthotics for you.
4. Watch your form!
Make sure that your running form is correct as a poor running form can over-stress your shins.
Our Recommendation
Tapes For Shin Splints
Taping for shin splints can help you heal and recover - as well as help you get back to your regular activities. The tape helps relax the tissue, alleviate any pressure contributing to the pain, and may also increase circulation in the affected area. Taping can further offer support as you return to the sport of your choice.
We recommend using the Gripit - Kinesiology Tape 50mm x 5m. There are a wide variety of colours available, so that you can make your return back to sport in style. We further recommend getting your doctor or physiotherapist to show you how to tape your shins properly. They know your specific situation and can show you in person how to correctly apply it.
View All Tapes
Ice Packs For Shin Splints
Icing is critical for treating shin splints. It helps reduce pain and swelling. Make sure only to apply the ice for 10-20 minutes at a time. Place a cloth in between your skin and the ice to avoid skin damage.
Our recommendations include the Mueller Reusable Cold/Hot Pack or the Vulkan Ice Bag. The Hyperice Utility Compression Device may also be used. In addition to icing, the Hyperice device offers compression - giving your leg the support it needs.
View All Ice Pack/ Cold Compress
Rehabilitation Devices
Strengthening the affected area can further help you return to your regular activities, as well as ensure shin splints don’t occur again.
TheTheraband Resistance Band Loop can help you perform non-weight bearing calf strengthening exercises. In addition, other imbalances may be found by your doctor or physiotherapists. For example, sometimes after assessment, the hip is found to be the problem causing improper form and other issues. The resistance band is an easy item to bring with you anywhere or store at home in order to perform the exercises prescribed by your healthcare professional.
View all of Theraband Flexbar
Disclaimer:
The information contained in this article is for general information purposes only. The indications provided are not a prescription and cannot substitute the recommendation of a health practitioner. We recommend that you seek the advice of your GP, physiotherapist or health practitioner before buying any item on Back To Sport.


Leave a comment